In today’s digital age, Instagram has become more than just a social platform. It’s a place to share our lives, interests, and passions with the world.
But in a sea of daily posts, it’s easy for your content to get lost in the shuffle. With millions of users on Instagram, standing out from the crowd can be daunting.
Nonetheless, editing your Instagram posts is a simple yet effective way to make your posts shine brighter than the rest.
Editing can enhance your photo’s quality, make it more eye-catching, and ultimately, increase engagement.
Optimizing a post after publishing isn’t just about edits, it’s also about engagement. For instance, if a photo isn’t getting much attention initially, some users choose to buy likes on Instagram to kickstart the momentum.
But how can you edit your posts to make them truly unique?
In this article, we’ll walk you through the step-by-step process of editing your Instagram posts before and after posting them.
So grab your phone, and let’s get started!
Before posting
If you’re new to Instagram, posting a photo for the first time can be exciting yet overwhelming.
Fortunately, Instagram offers many editing options to make the process easier for users of all skill levels. You don’t need to worry, even if you’re not a professional photographer or familiar with complex photo editing software.
Instagram’s intuitive and straightforward editing tools are designed to enhance your images simply yet effectively. In just a few clicks, you can transform your photo into a captivating work of art that will stand out on your followers’ feeds.
Adjusting your image
- Click on the + icon. Once you’ve picked your photo, you’ll be taken to filter options ranging from Normal to Nashville.
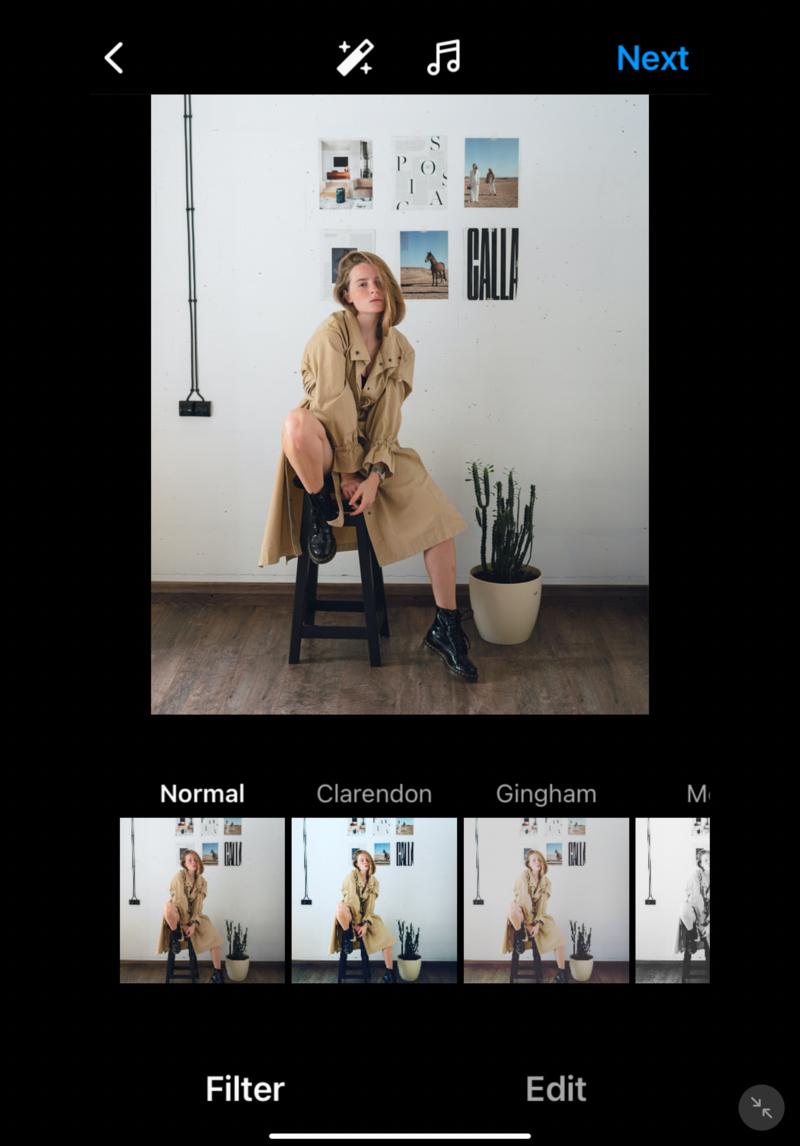
- Tap on the Edit option at the bottom of the screen. You’ll see a range of tools at the bottom of the screen as you scroll horizontally, such as Adjust. Brightness, Crop, etc.
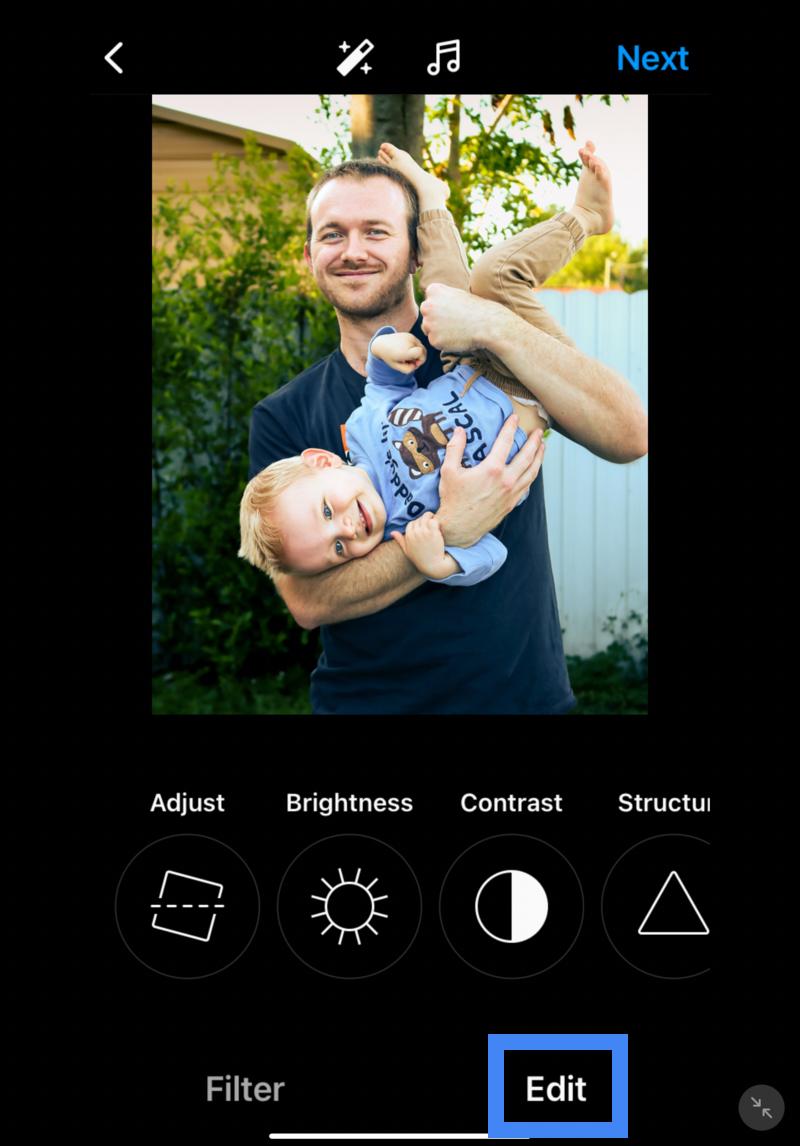
- Finally, tap on Done to save your changes.
With just a few taps, you can change your photo’s brightness, contrast, and saturation, crop and resize it, and even apply filters to enhance its appearance. These simple yet powerful features make it easy for anyone to create stunning, high-quality posts on Instagram.
Adjusting your sharing
Write a caption
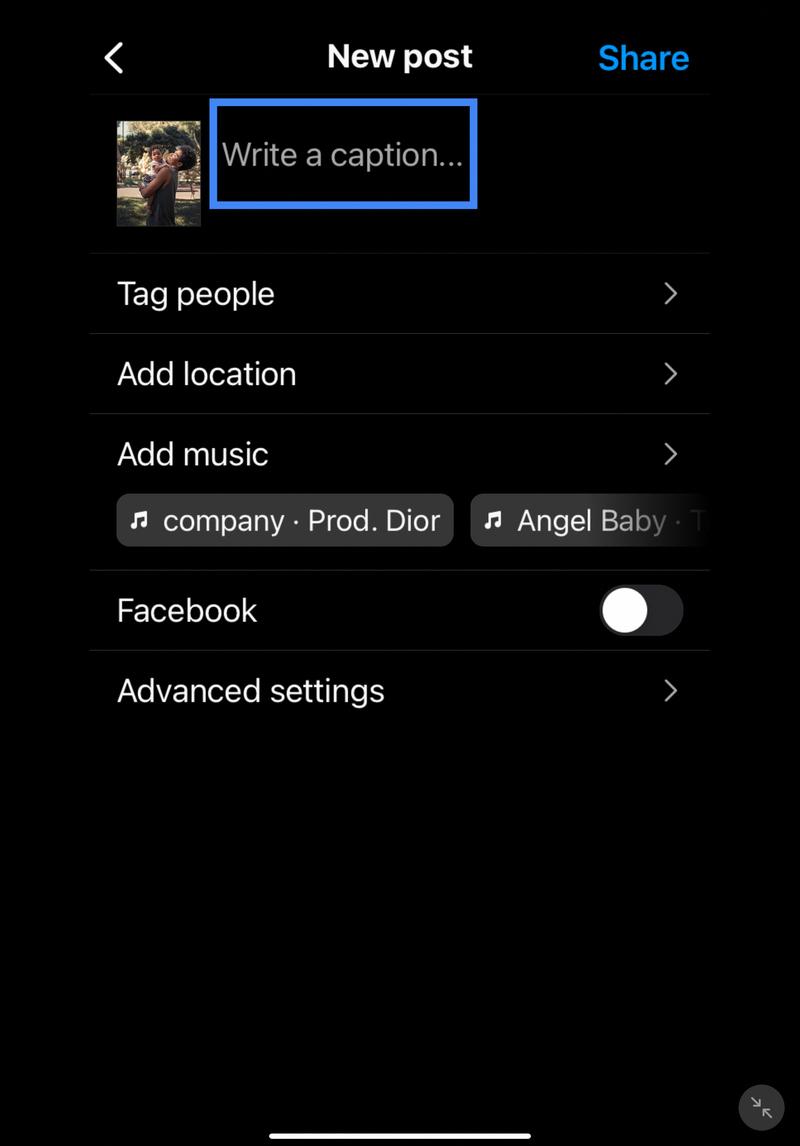
This is where you can write a brief description or story related to your post. It’s also an opportunity to use relevant hashtags to help your content reach a wider audience.
Nonetheless, it’s important to balance and avoid overloading your caption with too many hashtags, as it can come across as spammy.
Tag people

Tagging people in your post is another way to increase engagement, especially when sharing a photo with friends or colleagues.
It’s simple to do – tap on Tag People, select the photo, and tap on the person you want to tag. Keep in mind that Instagram allows a maximum of 20 tags per post.
Add location
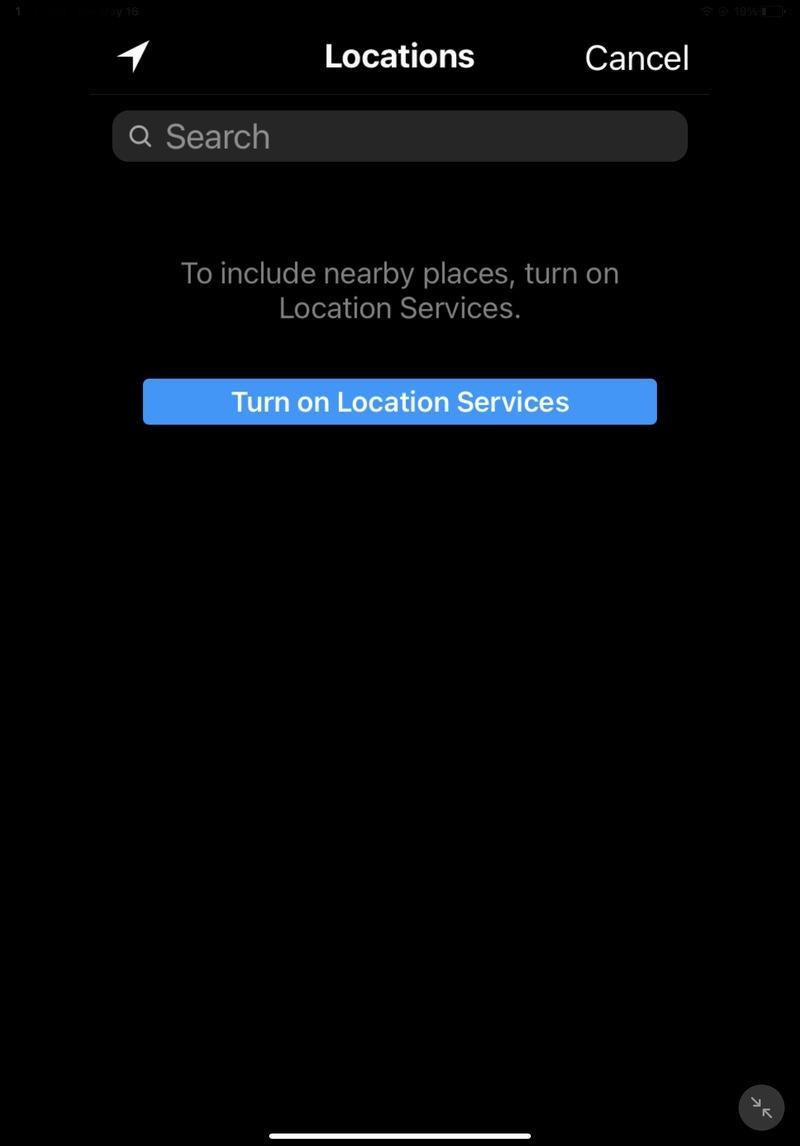
Adding a location to your post can also boost its visibility. Instagram provides a list of nearby locations based on your phone’s GPS, but you can also search for other locations using the search bar.
Tag products
If you have a business account, you can tag your products in your post by selecting Tag Products and choosing the product you want to tag from your catalog.
Other settings
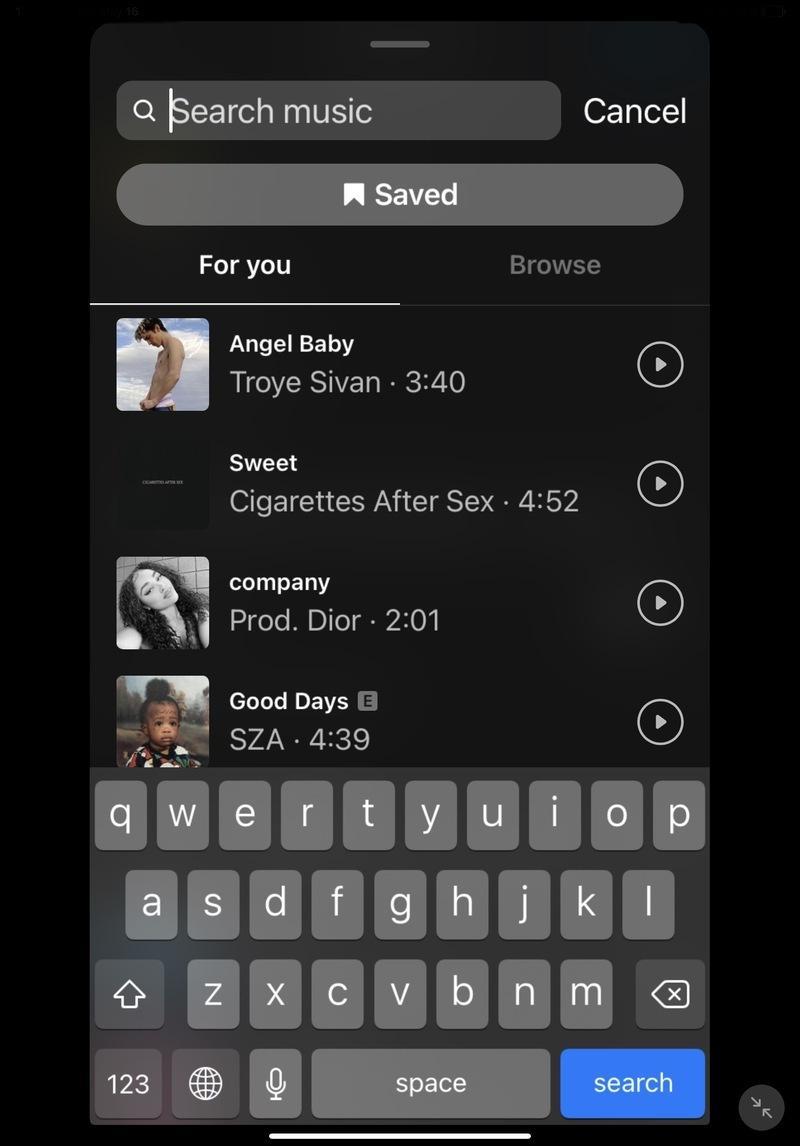
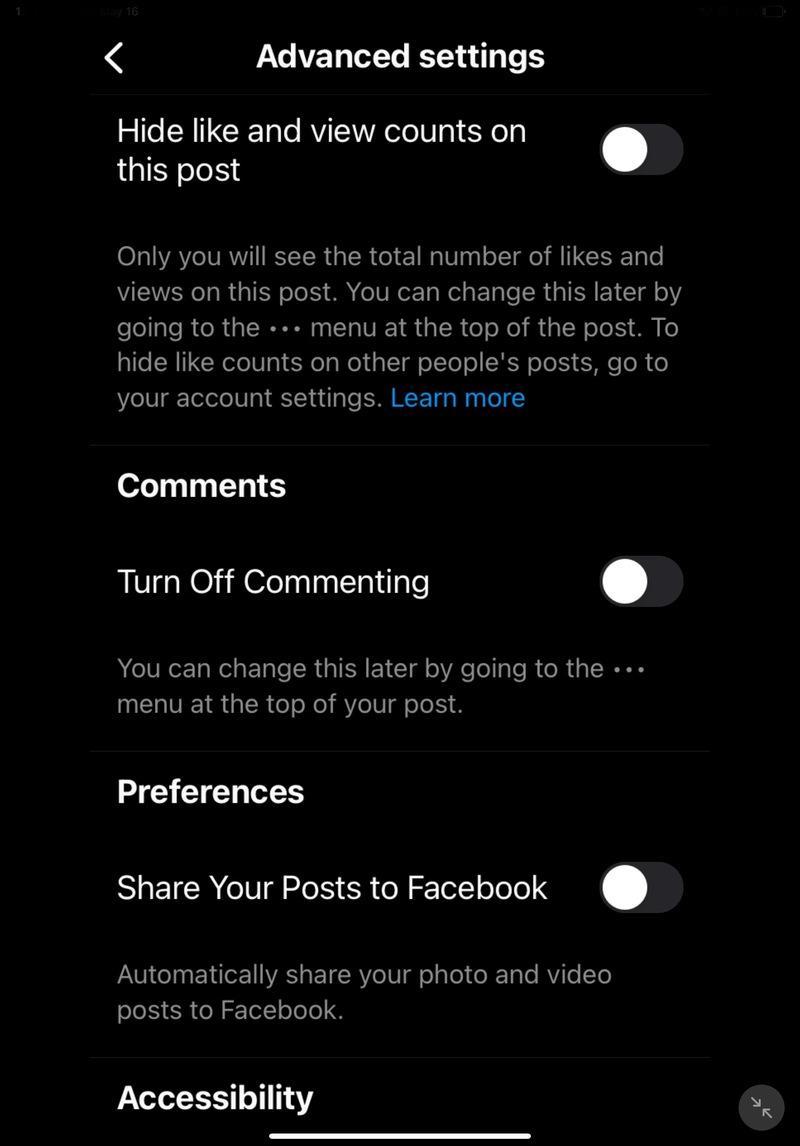
You can add music, and if you have a public account, you can cross-post your content to Facebook, Twitter, or Tumblr directly from the Instagram app. There are more features under Advanced settings where you can do the following:
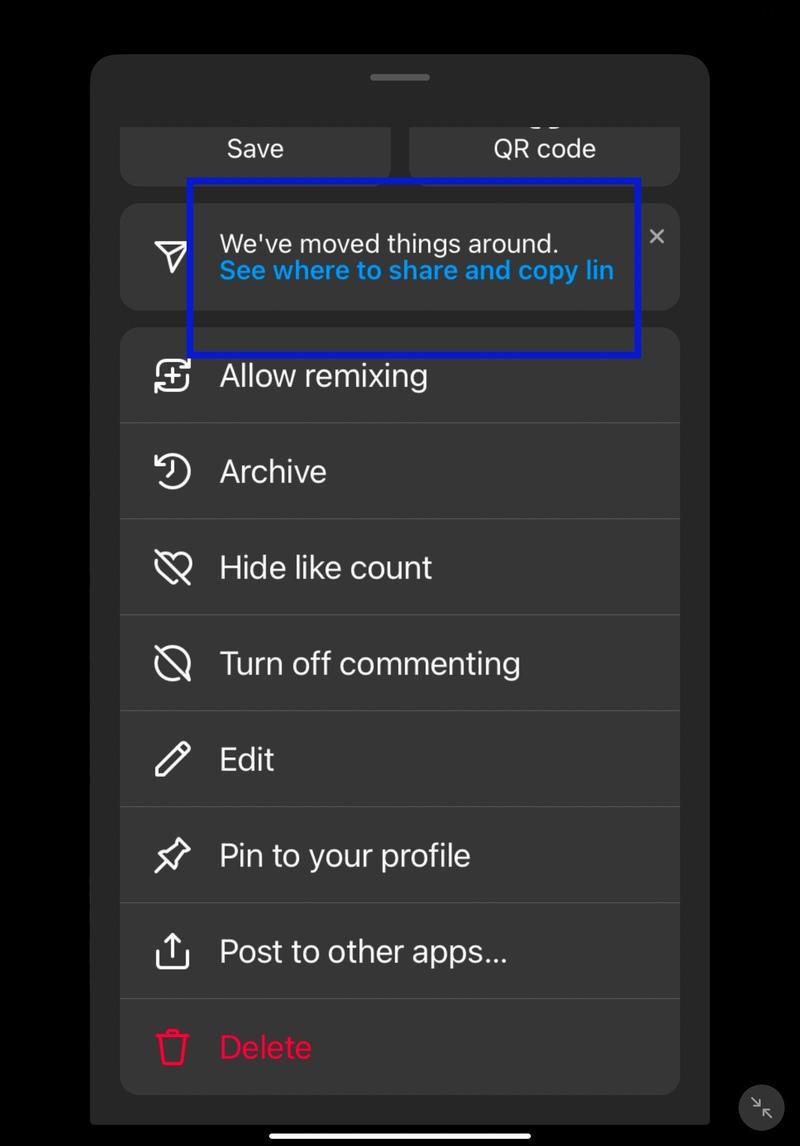
- Hide Like and View counts
- Turn off commenting
- Provide alt text (more detailed description of post for the visually impaired)
When done, click on Share.
After posting
You may have noticed a typo in your caption or want to adjust your photo’s brightness or saturation.
Editing after posting can be helpful if you receive feedback from your followers and want to make changes based on their comments. Additionally, you might want to update your post with new information or add tags or locations that you forgot to include initially.
Whatever the reason, editing after posting on Instagram allows you to make changes and improvements to your content, ensuring that it looks its best and serves its purpose effectively.
Here are the easy steps to editing your post (after posting it):
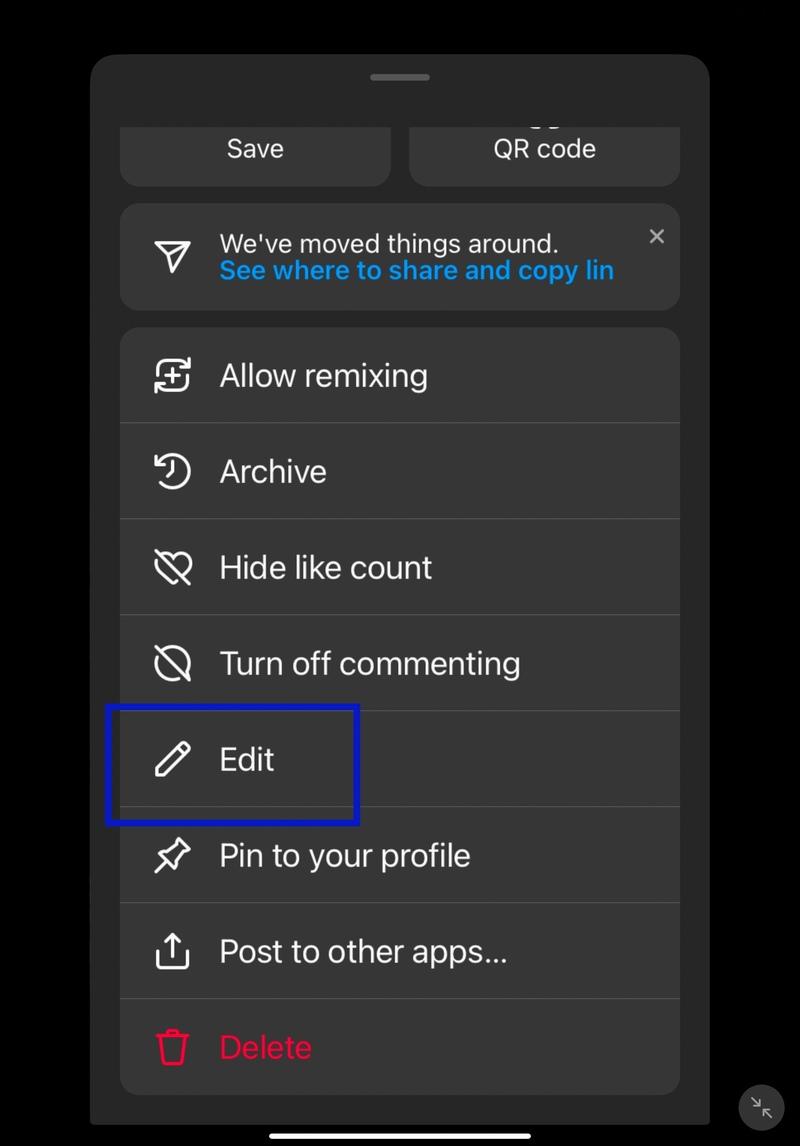
- Once you have posted a photo or video, you can still edit it by clicking on the three dots on the top right corner of your post and selecting Edit.
- You can change the location by tapping on the blue location text, which allows you to choose a new location from the list or search for one using the search bar.
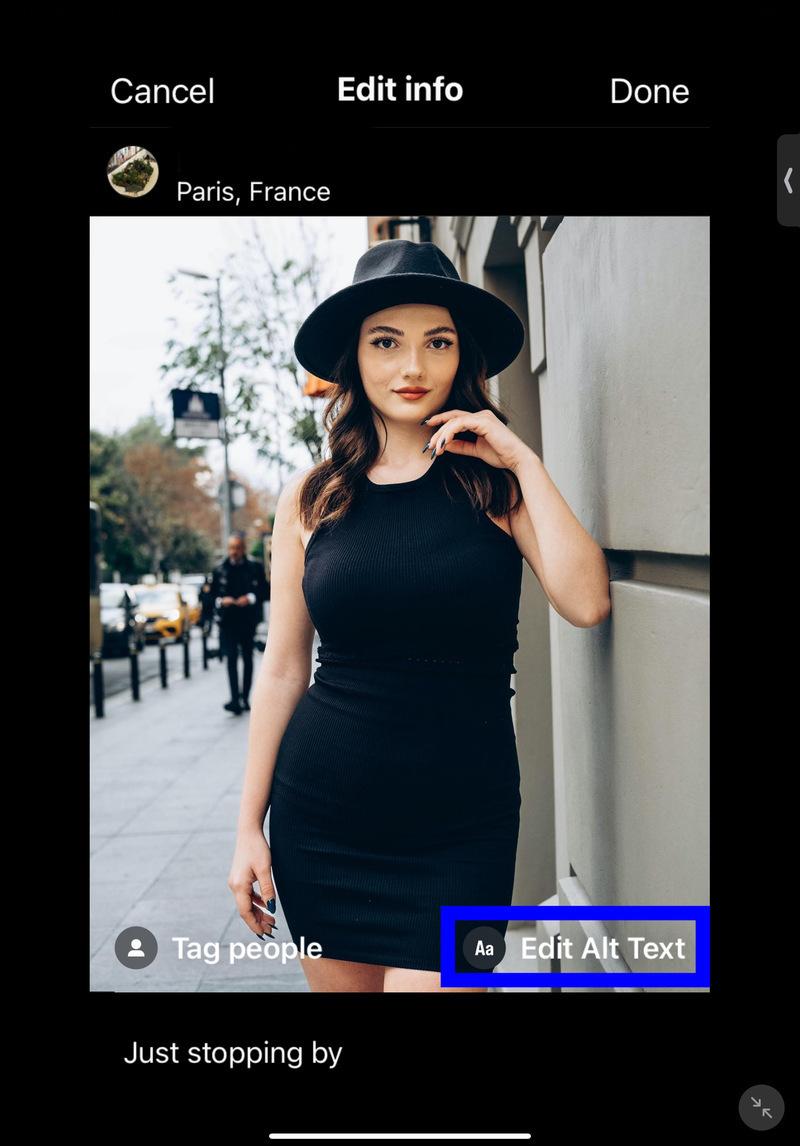
- You can also add or change tags by tapping the tag icon at the bottom left of your post.
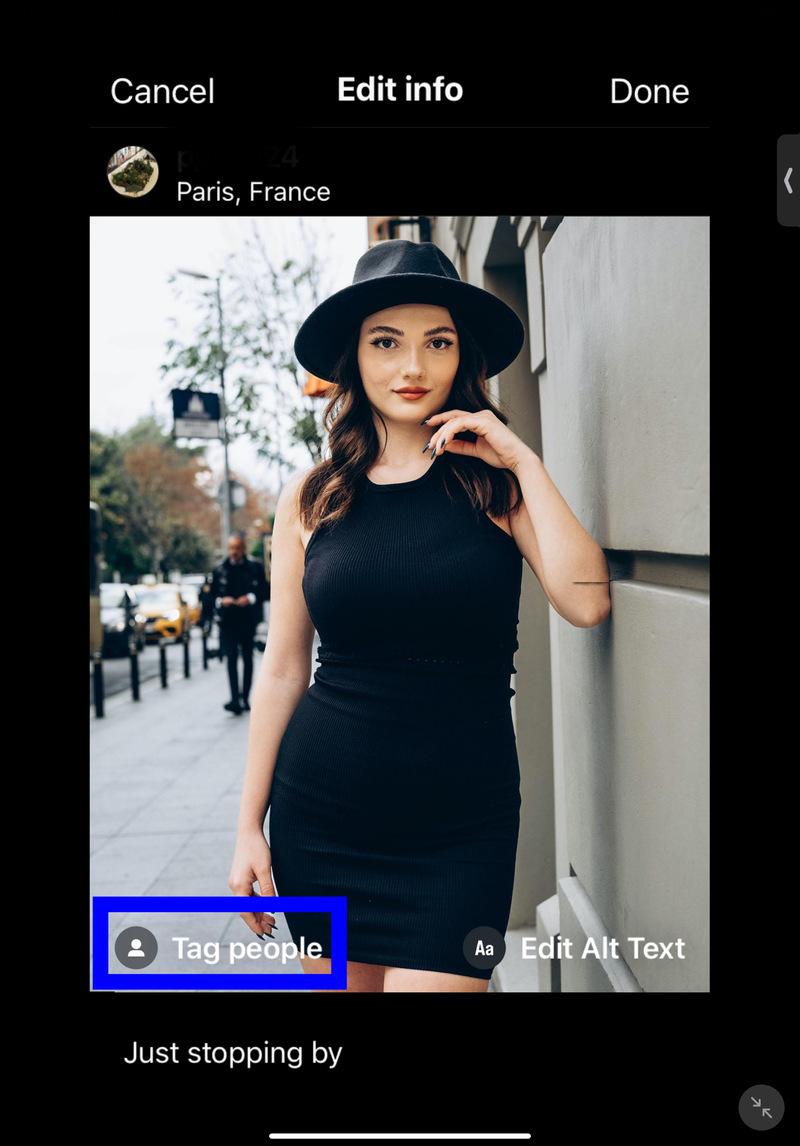
- Another option is to edit the Alt Text by tapping the ‘Aa’ icon at the bottom right of your post.
- Lastly, you can edit the caption of your post, including hashtags and other text.
You must note that you cannot change image adjustment features like filters or cropping after posting. Make sure to save any changes you make after editing.
However, keep in mind that any changes you make to your post will be visible to your followers and may affect your post’s engagement. It’s always a good idea to double-check your post before publishing it to ensure it’s exactly how you want it to appear.
FAQs
Can you edit Instagram posts after posting?
Yes, you can edit Instagram posts after posting but limited to captions, hashtags, location, alt-text, and tags. You cannot, however, make changes to your photos.
Can you delete a picture from Instagram multiple-post?
Yes, you can delete a picture from a multiple-post. Simply go to your post, click the three-dot icon, and choose Edit. Scroll for pictures you want to remove and click on the trash icon on the top left side.
Why can’t I edit my Instagram post after posting?
The most probable reason you can’t edit your Instagram post after posting is there is no app permission to access your media, files, and even the camera on your mobile device. There may also be a bug affecting its functionality.
")

